I’ve written a walk through of the St. Luke’s Medical exam, so now it’s time to explain what happens at the Manila US Embassy interview for immigrant visas. We did a spousal visa, but I’ve included information relevant to the fiancee visa as well (the process is the same but some of the documentation issues are a little different).
Preparing for the Interview:
Before I proceed with the walk through I’ll share something we were told at the medical exam. Most visa denials happen for the following two reasons:
1. Issues with the identity of or relationship to the petitioner. In other words, there is not enough evidence to prove the petitioner (American spouse/fiancé) is a real person or has a genuine relationship with the applicant.
This is why it is a big advantage for the petitioner to attend the interview with the applicant if possible. It isn’t completely necessary, and most applicants do not have their spouses/fiancés with them at the interview. But it is ideal, since it pretty much eliminates any doubt.
There are other ways to document the relationship: pictures, printouts of emails or online chats, receipts, etc. This is a little more challenging with fiancee visas because you won’t have any legal documentation of your relationship (a spouse would have a marriage certificate).
NOTE: It is a good idea to print out a few pictures of the two of you together (dates, the wedding, etc.), regardless of whether or not the petitioner comes to the interview.
2. Issues with the affidavit of support. The couple has failed to prove that the petitioner has sufficient income to support his wife/fiancé.
Hopefully you’ve already submitted everything that is needed with the affidavit of support. But if you want to bring some recent pay stubs or something else you haven’t already submitted it won’t hurt. IRS receipts are also good and can be ordered free of charge from IRS.gov. Be sure to bring a copy of the affidavit of support and documentation from the most recent tax year. If you are using a cosponsor you’ll need to bring tax information for both you and the cosponsor.
Note: what I’ve shared about the affidavit of support applies to the spousal visa. But the requirements for the fiancee visa are more strict (I have explained why in a post about the Fiancee vs Spousal Visa). Fiancee visa applicants should bring the original affidavit of support with an original signature, a copy of the petitioner’s last years income tax statement (or IRS transcript), and a letter from their employer. It’s also a good idea to bring their last 4 most recent payslips (I actually remember the Filipina interviewer asking for pay stubs from another couple).
The Manila embassy also does not normally allow cosponsors for the fiancee visa. The embassy usually only makes exceptions for full-time students or certain medical conditions.
We went into the interview with the philosophy of being over-prepared—we had certified copies of almost everything we had already sent to the National Visa Center. We also printed a few pictures from our wedding and first dates.
Preparing to stay in Manila:
I’d highly recommend checking into a hotel the night before the interview if you do not live in Manila. Bayview Park Hotel is probably the closest and we had a pretty good experience there. The wireless internet was a bit slow, but otherwise it was a good place to stay. I chose it because it is walking distance from the embassy. I didn’t want Manila traffic to cause us to run late. Note: the hotel may require to see a copy of your I.D. and credit card if you pay online. You may need to call them and work that out if she will be going without you.
Another advantage to the hotel room is having a place to leave your belongings while you are at the interview (our room had a little safe in it). Remember this: you cannot bring any form of electronics inside the embassy—cell phones, iPods, and other gadgets are prohibited. Americans can leave such items at the security check-in, but Filipinos (those who are not US citizens) cannot.
Getting in line outside:
Lines outside of the Embassy are grouped according to appointment time and type of visa. We were guided to the correct place by some of the street peddlers offering various services to those in line. Speaking of which, there are people who make a living by holding electronics (like cell phones) for you while you are inside the embassy. I believe most of these people were legitimate, but I’m glad we didn’t have to take that chance.
We decided to arrive about an hour and a half before our interview time. We were ahead of most of the others who came for our same time slot, but I’m not sure it made any difference once we got inside (I’ll explain that later). Anyway, I’d recommend arriving about 1 to 1.5 hours before your appointment time.
 RECOMMENDED: I recommend Christian Filipina for those who are serious about finding love in the Philippines.
 Once you get near the embassy entrance you’ll go through the first “checkpoint.” The applicant (your wife/finance) will show her appointment letter to an embassy employee. The employee will check to verify the appointment letter and will put her passport in a plastic bag.
Security and Ticketing:
Next you’ll go through a security checkpoint upon entering the embassy. It’s kind of like what you’d go through for airport security. After the security checkpoint the applicant will proceed to to a window on the other side of the security room. She’ll present her appointment letter again and receive a ticket with a number on it. This number should be kept the rest of the day because it is what they will use to call you for the next steps.
Going In:
The next step is to go inside the main embassy building. This is where all the real business of visa approval (or denial) happens.
There are five steps to the process:
1. Finger printing
2. Initial screening (done by a Filipino staff member)
3. American consul officer interview
4. Final clearance
5. Arranging delivery of the passport
These five steps are the culmination of several months of waiting so it can be a little nerve-racking. Just try to relax because hopefully you’ve already done everything needed to ensure your paperwork is in order (I had professional help in preparing our documentation–another thing I’d highly recommend).
Upon entering the building the applicants are instructed to sit down and watch for their number to appear on a screen. Everyone waiting must sit down. Standing is prohibited and there are plenty of seats, all within view of the screen. The numbers are not in any kind of order, so you just have to watch and wait for yours to appear. You’ll be directed to go to different windows according to the step you are on. Now for more information on the five steps:
1. Finger printing: self-explanatory.
2. Initial screening: this first interview and is done by a Filipino employee. I’ve heard that the Filipino interviewer sometimes plays the role of “bad cop,” but ours was pretty friendly. She asked us to identify ourselves, verified a few things in our paperwork (like our address), asked how we met, how many times we had been married, and also asked to see pictures . She also asked my wife if she had lived in any other countries and if she had ever been to the States before. This is the stage where the applicant surrenders her passport to the embassy. It was over in less than five minutes for us, but maybe it takes longer if there are issues with the documentation.
3. Interview with the American consular officer: you start by raising your right hand and swearing to tell the truth, then proceed with the interview. We were asked some of the same questions that were presented at the initial screening (how we met, when we married, etc.). Our officer was very friendly and the interview seemed to go even more quickly than the previous screening. This is where you will usually be told if the visa has been approved, denied, or if there is a need for further review. He ended by telling us everything was in order and the visa was approved. He also gave my wife a little pamphlet on domestic violence (something given to all applicants).
4. Final clearance: A Filipino staff member will call you to a window for any final instructions. I guess those who are denied get their passports returned to them at this stage. Those who need further review would also get some kind of instructions I presume. But the clearance is a quick formality for those with approved visas.
5. Arranging the delivery of your passport: You will turn in a delivery form so they can send the stamped passport to you. The teller will verify the address and case number on the form.
That’s it. Once you have completed these five steps you are done. The staff will not give you a direct answer on when to expect the passport, but it is usually delivered within 5-7 days (my wife’s came three days after the interview).
Remember that after the passport comes you need to do two things ASAP (one for the US government, one for the Philippine government). Both need to be done before you leave:
*Pay the immigrant fee (yes, another fee–it’s the government, after all). Just go to the USCIS website and search “pay immigrant fee.”
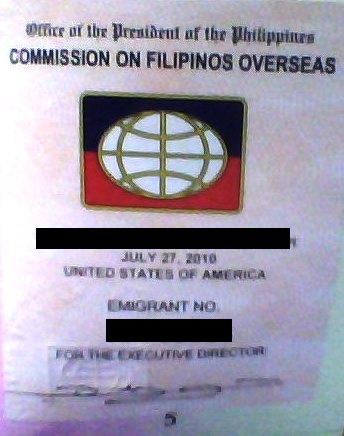
*Arrange to get the CFO stamp on her passport (she’ll have to attend a seminar for this if she hasn’t already).
See Also: The St Luke’s Medical Exam for Immigration
 RECOMMENDED: REMITLY